

Beeswax wraps are a natural and reusable alternative to plastic wrap or aluminum foil for food storage.
They are made from a blend of beeswax, tree resin and oil, all melted together and brushed onto a cotton fabric, which gives them a natural ability to form a seal around food items and keep them fresh.
People like to use natural wraps because they are environmentally friendly, plus they are so fun and easy to make. They are natural and can be reused and eventually biodegrade as opposed to sealing food with one time use plastic such as plastic wrap.
Yes, there are pros and cons for beeswax wraps but really, you can't go wrong with these easy to make homemade food wraps, but if you want to try buying beeswax wraps first, check out our buyers guide here:

What can beeswax wraps be used for?
Beeswax wraps can be used to cover food items like sandwiches, cheese, fruits, vegetables, fruit dried in the dehydrator and baked goods.
They can also be used to wrap bowls, jars and other containers to keep their contents fresh. Some people also use natural wraps to store items other than food, such as soap, cosmetics, or small household items.
Beeswax wraps are also really great for using in your kids lunches to keep their food fresh and separated.
In addition to being environmentally friendly, these wraps are also versatile and easy to use. They can be molded around different shapes and sizes of food and containers, and they will hold their shape when they cool.
How do you clean beeswax wraps?
Beeswax wraps are also easy to clean – you simply wash them with cool water and a mild soap, and allow them to air dry. Beeswax wraps can last for several months with proper care, and when they are no longer useful, they can be composted.
This is the soap we recommend and you can read more about why this soap is the best natural soap in our article How To Make Insecticidal Soap.
It is easy to make effective natural wraps to seal your food as long as you use the proper materials and ingredients, which include cotton fabric, natural beeswax, another oil blend and tree resin.
Let's talk about those specific ingredients to better understand why you need those exact materials, and then we will give you a great recipe to make your very own beeswax wraps with.
Cotton fabric for DIY Wraps
Yes, cotton is typically used to make beeswax wraps because it is a natural and breathable material that absorbs the beeswax mixture well. Other natural fibers like linen or hemp can also be used, but cotton tends to be the most popular choice.
It is important to use 100% cotton for these wraps because synthetic materials like polyester or nylon will not absorb the beeswax mixture properly and will not work as well for food storage.
Also, keep in mind that synthetic materials are not as environmentally friendly as natural fibers, and they do not biodegrade as easily.
If you are unable to find or use 100% cotton, you can try using a cotton-poly blend, but keep in mind that the wraps may not be as effective at sealing in freshness and may not last as long or decompose as easily.
Here are 3 small online stores that sell gorgeous cotton material that will work perfectly for making beeswax wraps with:

Crafting Fabric (has lots of honey bee prints)
Real Beeswax- The Key Beeswax Wrap Ingredient!
Real, pure beeswax is used to make beeswax wraps because it has several properties that make it well-suited for this purpose.
Beeswax is a natural, water-resistant material that has a high melting point and a natural ability to form a seal around food items. It is also naturally antimicrobial, which helps to keep food fresh and prevent the growth of bacteria.
Here are the BEST ways to use beeswax around your home
Beeswax wraps are made by melting beeswax and combining the wax with tree resin and oil, which helps to make the wraps more pliable and easier to mold around food items.
The beeswax mixture is then brushed onto fabric and baked in the oven to allow the beeswax to fully absorb into the fabric.
Where to buy REAL beeswax?
As beekeepers, we know how important it is in purchasing REAL beeswax that isn't chemically altered in any way so you get all of those amazing properties that come right from the bees.
Plus, supporting small farmers is something important to do if you want to support natural and ethically-sourced materials.
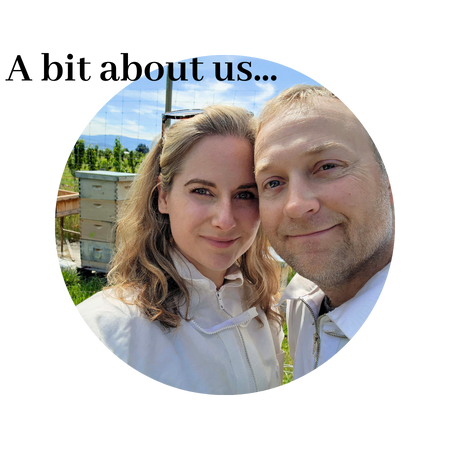
Here is a photo of my husband at our beehives in the backyard (sorry, we are not selling our own beeswax, maybe one day!):
It is also important to use real beeswax when making wraps because other types of waxes that may be blended in from a commercial company may not have the same properties or may not work as well for food storage.
For example, paraffin wax is often used as a cheaper alternative to beeswax, but it is not as effective at sealing in freshness and does not have the same antimicrobial properties.
Additionally, paraffin wax is a byproduct of petroleum and is not a natural or environmentally friendly choice.
We love supporting other small beekeepers and promoting their farms and products, and we have a really great article about where to buy real beeswax from, which you can read right here:
You can also check out this Beeswax from the this little farm, who we feature in our beeswax buyer's guide article. We have worked with their beeswax before and it is a great, pure product.
Check out their beeswax right here
Tree resin - To hold it all together
Tree resin is used in beeswax wraps to provide some stickiness, which allows the wrap to adhere to itself and to surfaces, such as bowls and containers.
This stickiness is an important feature of natural wraps, as it helps to keep the wrap in place and to create a secure seal around the food or other items that it is covering.
In addition to providing stickiness, natural resin also has some antimicrobial properties, which may help to extend the shelf life of the wrapped food.
Pine resin is also a natural and renewable resource, making it an attractive choice for use in eco-friendly products like beeswax wraps.
Many people who make wax wraps often get frustrated that their wraps are not sticking properly to their bowls and plates. This is due to their lack of natural resin or to them not buying the proper tree resin.
What kind of tree resin should you use in beeswax wraps?
Tree resin or rosin is a natural substance that is produced by many types of trees, and it is typically used in a variety of products, including adhesives, incense, and skincare products.
To make beeswax wraps, you can use any type of resin from trees that is available to you. Some common types of tree resin that are used in beeswax wraps include:
- pine rosin
- spruce resin
- fir resin
These types of tree resins are often sold in the form of small beads or granules, which can be melted down and mixed with beeswax and oil to create the wrap.
When selecting a natural resin for beeswax wraps, it is important to choose a resin that is pure and free of any additives or contaminants.

How To Make Beeswax Wraps
Beeswax wraps are usually made by combining beeswax, tree resin, and oil, such as jojoba or coconut oil, on fabric or paper to create a pliable, waterproof wrap that can be used as a reusable alternative to plastic wrap.
Here is a quick and easy recipe you can use to make DIY natural wraps.
Beeswax Wraps | Ingredients:
- 1/4 cup pure beeswax pellets/shavings (if you are using a block of beeswax, use a kitchen scale to weigh about 2 ounces of beeswax or you can use a cheese grater to get the grated beeswax yourself.)
- 1 tablespoon tree resin
- 2 tablespoons oil such as jojoba oil or coconut oil (we linked to the ones we recommend on Amazon)
- Cotton fabric
Beeswax Wraps | Tools:
- Double boiler or microwave-safe container
- Brush or roller
- Scissors
- Parchment paper or silicone mat
- A Wax Melter
Beeswax Wraps | Instructions:
- Combine the beeswax, tree resin, and oil in a double boiler or in a wax melter (this is the one we use!) Heat the mixture on medium heat until the beeswax is melted and the ingredients are well combined.
- Cut the fabric or paper into the desired size and shape for the wraps.
- Brush or roll the beeswax mixture onto the fabric or paper, making sure to coat it evenly. It should be saturated but not dripping at all when you pick it up.
TIP: We recommend doing this on a warm baking sheet to contain the extra oil. - Place the coated fabric or paper onto a parchment paper or silicone mat and allow it to cool and harden.
- Once the wrap is completely cooled and hardened, it is ready to use. To use the wrap, simply press it around a bowl, container, or food item to create a seal. The wrap will become more pliable and easier to use as it warms up.


You can adjust the amount of beeswax, tree resin, and oil that you use to achieve the desired level of stickiness and pliability in your reusable beeswax wraps.
You can also add essential oils to the mixture to add a pleasant scent to your wraps if that is something you would like to do. Just be sure to use a pure essential oil.
We recommend this brand of pure, organic essential oils from Amazon. It is the brand we have used for years in our cold process soap and we highly recommend them.
You can also purchase beeswax wraps on Etsy here | CHECK PRICE
In Conclusion
Beeswax wraps are easy to make if you have the right materials. It is very important to have the right wax mixture to make your DIY beeswax wrap and that you lay this wax evenly on to your homemade wraps with a paint brush (one that is new) or a new roller.
It is also important to choose your ingredients from good sources: your beeswax should come from a beekeeping operation so you know that it is pure, your pine resin or whichever resin you want to use should be pure, and your materials should also be pure (not synthetic fabrics). Again, we recommend cotton fabric.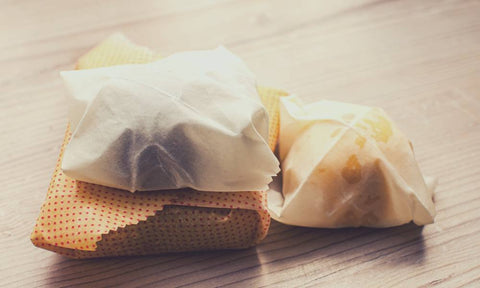
If this is your very first time trying to make beeswax wraps, it will take some finessing. Don't be discouraged if it is not perfect the first time around.
You can always purchase a premade beeswax wrap and use it as your guide.
Compare your finished beeswax wrap to it, and feel the difference. Is the premade wrap stickier, more saturated?
You may decide that you need to alter your wax mixture in some way, or that you had too much excess coating mixture or excess wax on your food wraps. Maybe you need to add more wax on your reusable food wraps. Having a model to compare to is a great guide.
Shop for beeswax wraps here | CHECK PRICE
We hope we helped you learn how to make DIY beeswax wraps using pine resin (or another tree resin), real beeswax and an oil (jojoba oil or coconut oil).
Making your own reusable wraps is a rewarding and environmentally friendly craft. Beeswax food wraps also make great DIY gifts and also sell very well at craft shows.
Here are some other articles you may be interested in reading:
BEST Beeswax Wraps | BUYERS GUIDE
BEST Uses For Beeswax In Your Home
How To Make EASY Beeswax Lip Balm
Beekeeping Equipment List | How To Start
Using Beeswax For Furniture Polish
Did you like this article?
❤️ Here's how you can support our blog:
My name is Linnea and I am a backyard gardening enthusiast! Along with my husband and our two kids (and chickens, ducks, bees and our little dog). Our hobby - growing our own food and making our meals from scratch. My blog, The Farmers Cupboard, is the website that blossomed from that passion. I love every second I spend sharing our hobby with like minded backyard growers.
It's easy to support my blog, and it is so appreciated. Please SHARE an article somewhere, pin a photo to your Pinterest board, follow on any of our social medias or sign up for our newsletter! That's it!
These little things help our blog grow and allow us to continue doing what we love: growing good food and sharing what we learn.
PINTEREST PASSIONATE? We're opening up our cupboard to you!
Click on the pin below made just for you. It will bring you right to my little Pinterest community, where I would love for you to FOLLOW The Farmers Cupboard and see all of our gardening and backyard dream ideas!

Let's grow good things together!

2 comments
Showing items 1-2 of 2.


Best Vacuum Sealer For Food | How To Properly Preserve


Compact, affordable and reliable vacuum sealer.


Thanks so much Kathryn! Oh this is totally a great addition to honey sales. Have fun with the process, keep us updated as you try making them, would love to hear how it’s going :)
Awesome diy information…want to try this as we have a honey business. Will research a little bit more. Thankyou.